Wednesday, July 31, 2013

Update

Well, it's been awhile since my last update and boy oh boy have we been busy. Between getting ready for little guy to get here Sept 6th, potty training (yep our little girl is potty trained at 16 months old), and house projects - it's been crazy go go go. And to top it all off - I am finally back in the 15* range (159 lbs to be exact) - haven't been that low since second year of college - wahoo.

So in a nut shell here's topics I'll be posting soon -
  • Building Mario shelve and Mario rug (my wife did a great job on the rug and painting the doors for the shelve - we used some other blogs for the ideas, but I'll be posting the templates and full instructions, etc.
  • Bought a Cedar Works Playset (modified Frolic 9) so I'll be posting information on putting it together and review on it all said an done - it ships this Friday, so exciting.
  • Review of NextFit carseat - very excited about.
  • Exercise information - I found out that I have been unknowingly training for Tower Running  and never even heard of it - I was just trying to loss weight and get in shape for cheap on lunch (who knew).
  • Microsoft CRM stuff (work related) - tips and tricks and best practices that I have learned.
  • And probably a few other things randomly for good measure.

Thursday, July 12, 2012

House +1

Well I went to open the garage door on the side of the garage I was working on the new desk and the door didn't budge. However I was unable to see what was going on since the desk was under the opener. I moved everything to the other side last night and opened the opener only to find a completely stripped worm gear. What are the odds the opener would break at the same time I started working on my desk. I thought I did something (mutter saw or piece of wood wedged against the door or something) but it was pure chance. I just ordered the parts from Amazon $16.47 with shipping. So that project will get added to the list.

Teach me to try and do a fun project! My house said - none of that nonsense.

Tuesday, June 26, 2012

Status

Well, yesterday was my daughter's 4 month check up so my wife took her to get her shots and she wasn't a very happy baby. So we only got a little bit done as Kyrie enjoyed cuddling lots last night with the both of us.

I was able to get the drywall patched and done in my office, so we can start painting. And my wife had a really good idea for putting some shelves in my office so I could get rid of my old TV entertainment stand. We'll be using 10" or 12" pine with some nice look brackets (have to decide which I like) running the full length of the wall so I can put all my DVD's, CD's, and even my home theater stuff on it.

And my wife was able to get another coat on the table. I really am liking the stain finish. We'll see if I regret this later or not, but right now it looks good.

Monday, June 25, 2012

So, first thing I did was get a 88" x 28" piece of particleboard 1/2" thick. Then I measured in 3" from the edge and snapped my caulk line. This is for my carriage bolts that will attach the top to the legs once done. I wanted them to be hidden and strong.  


I drilled my holes at 9" and 20" from the back of the desk.


Here is a side shot of the carriage bolt anchored in to the wood.


I am using my leftover 3" x 3/4" thick red oak hardwood flooring for the top. To make the edge a little different i trimmed it down to 2 1/4" so it would stick out from the main work area. With my measurements, I am able to hang it over just enough that my final desk top will be 89.5" by 30.5".

This is the corners being clamped down. As you can see, I forgot to put the carriage bolts in this side before working... Opps. Luckily I had enough room to still add them.


This is what the carriage bolt looked like next to the trim (told you I had barely enough room to still add them). To make the board fit over the head of the bolt, I simply drilled several holes. I had a bigger wood bit, but with the pilot point it would have been through the wood before I got enough dug out to hide the bolt.


I placed another carriage bolt in another 16.5" from the right side to allow me to bolt on an additional leg brace that I can mount 16" w X 24" d shelves to. 


Here is the final product. I made the center piece bigger (30") and the two sides 25", for a slightly different look. However, it appears I should have made the center bigger and the sides smaller as it seems like it's hard to tell there's a difference. 


Here is a picture of my office. I meant to take a complete before and after, but we got started cleaning and I realized I hadn't done that yet. So this is actually much cleaner than it normally is. But as you can see, still a mess and nothing matches. I am going for a Asian theme in my final room. Let's hope it goes well.

Next is the legs and to paint the office. I'll keep you posted on how it goes. We will be leaving in a week, so I'll see how much I can get done before I'm out of town.

Oh, I also ordered a dual monitor mount and some desk grommets which should come in the week. I plan to have 3 grommets (one on each side and on in the back middle).


Here's the links to those. http://www.amazon.com/gp/product/B002R9HQLI/ref=oh_details_o00_s00_i00 and http://www.cableorganizer.com/flexible-soft-top-grommet/. I went with the gray grommets and the monitor mounts are by MonMount (great reviews and some of the cheapest mounts you can find).

Status

So over the weekend, I was able to get the top done with the help of my wife and my little girl. The only thing that is left is to finish the polyurethane. Since it is hardwood floors it already has a several coats on it, but I wanted to smooth it out between the boards. We had some leftover stain finish and I really like the look it gave but it doesn't appear to have filled in anything. It seems it just ran in between the boards. I know with the high gloss stuff it will fill and smooth the surface. Anyone have any suggestions on this or ideas? Thanks.

New Desk Ideas

I had two ideas for my desk and they have merged together in my head to have a clean look. First was this - http://aubreyandlindsay.blogspot.com/2009/08/making-new-desk.html. That was a great blog and I really liked the idea of the big desk. So my new desk is 7'6" by 30.5" deep. That is almost the full width of my office which will make it so I can finally put my printer and lamp on my desk instead of a old PC and some binders. 


The second idea was something I saw at NFM. I really liked the cross brace legs. I bought 2x2's to make them, but they are too small. However, my wife had the great idea to reinforce them with some of the hardwood flooring which if I do that will make them 3x3's which should be perfect.

Friday, June 22, 2012

New project!

Tomorrow I start a new project and my first since my little girl was born. So we'll see how it goes. Plus I'm excited as this is the first project in awhile that's a fun want to do project, instead of a have to do because something broke.

And the project is....... A new desk! Might sound boring but working from home two days a week, the cheap 5 year old Wal-mart desk is showing its age.

I plan to use left over hardwood floors for the surface mounted to 1/2 mdf and 2x2 for the legs. My goal is to make a solid beautiful desk. I plan to use lag bolts, carriage bolts, bolts, and screws to hold it together. This desk will be 7'6" by 31" deep and 29" height.

If I do this right it's going to be a awesome desk. Wish me luck! Pics to come

Thursday, June 23, 2011

Wednesday, June 22, 2011

And lastly

Well, on the final day we had "fun." So I apologize I didn't take many pictures. But I'll recap the day - we started at 6:45am and tore off the South side and the biggest section by 8am. However, no sooner had we finished then thunder was heard in the distance (and guess what wasn't called for that day by the weather people). So we rushed and had to waste 2 rolls of felt to cover the roof and keep our inside from getting wet. And guess what happened - I rolled my ankle and it popped about 5 times. I'm still recovering from it and we did get water spots. After it quit raining my wife ran to the store and bought more felt. We started the day up again around noon and thought there was no way we would be done by night. However, we had 7 people by 3 pm which had us going very fast and we finished by 8:45pm that night and I was the last one off the roof. We couldn't have done it without all the help. 

And this seemed to work the best - we had one ground crew (ran and got tools, cut shingles, etc), two sets of groups - 1 nailer, 1 shingle setter, and then the one of the last people assisted the two groups and I worked on all the slow tedious stuff - the skylight, the hip caps, the vents, etc. That worked very well and we ran like a well oiled machine.

My bad ankle.


Where all three met.


Like I said before, my ridge shingles were installed wrongly. The are suppose to open up away from the wind like below. If you look at the before they opened into the wind which means - strong wind could get under the shingle and rip it right off.
 My wife and dog enjoying not being on the roof.


And on that last picture we'll wrap this up as you can see by my wife waving goodbye :)

I'll post my handy dandy cheat sheet I used to go by and based off of that and my notes here, you my friend are ready to roof.

Closing thoughts - this is a lot of work, on some days we thought it was worth it, others were weren't so sure. Even if it's 79 outside, it's over 100 on the roof. So here's some post tidbits to help you -
  1. Try to do it one either cooler days or on days with lots of cloud cover and a good breeze, makes all the difference and start early as possible. 
  2. Put your shingle bundles in a wheel barrow and take to the shortest height of your house and buck them up from there or pay extra to have them put up, bucking shingles sucks.
  3. Be prepared to hurt. This was a non stop go go go job for my wife and I. We started Friday at 3pm and finished Monday night at 8:45pm, I had some minor things I did Tuesday, but that was the bulk of the worth. Saturday I worked from 5:45am to 12:30am with no breaks minus food.
  4. Two nail guns are better than one if you set yourself up properly. There were times it actually slowed us down trying to manage two people. But once you get your pace, it's great.
  5. Be prepared for the weather people to be wrong, wrong, and wrong.
  6. Cut your shingles before you nail down.
  7. Ensure you are nailing into the black sticky strip on the row below you. No where does it say this in the instructions, but you should be nailing into the previous row and usually around the sticky strip.
  8. You'll itch bad - there's fiberglass in everything for roofing and it gets in your skin and itches.
  9. Buy a pack of cheap gloves. I bought some nice gloves and within 2 hours I had holes in the finger tips. 
  10. Eventually you'll stop caring about throwing stuff in the yard and want to just toss it all down, but then you have to go and clean it up later when you are completely wiped out. Just be prepared for it.
Lastly, cost update - we ended up having to by more felt, hook blades, and roofing cement, but I actually only used 47 bundles of shingles so I took back 4 (keep one just in case) and some extra drip edge. I'll post the exacts later. Thanks everyone and good luck. Let me know if you have any questions or let me here your story!

David & Rachel

Roofing Pictures of the project

OK everyone. Sorry for the delayed update. I apologize. As my ankle has been slowing me down greatly, plus last weekend was Father's Day, I have been a little slow to get these pictures up. I'll upload my document that I went off of for the install tomorrow.

This is my old skylight. I took plenty of pictures to ensure I new how it was attached. Notice all the black stuff on the left side of the picture? That's where we had all the problems with the leaking. 


Good idea to take plenty of pictures of all your vents, ridge cap directions (in my case it was put on incorrectly, I'll explain below).


 This is how all the areas met for my ridge. I did a slight variation of this.


 Here is my beautiful wife and her mother scrapping off the old roof. We had an interesting time in the fact that the roofer laid down two rolls of 15# felt. So... you're asking yourself? Well the problem was that they stapled one roll and cap nailed the other. This wouldn't have been a problem, except they used huge 2" staples to hold it down. Which means our tear off tool was hitting something everywhere. We ended up using a combination of a shingle tear off tool, a spade shovel, and a potato fork. All had pros and cons - shingle tool - great at pulling up nails, staplers, and shingles, but very heavy and got stuck a lot; spade - couldn't really get under the felt very well which meant for a lot of post cleanup; and potato fork - my favorite, light weight, got under everything easily, but left nails and hurt your back due to the small size. 


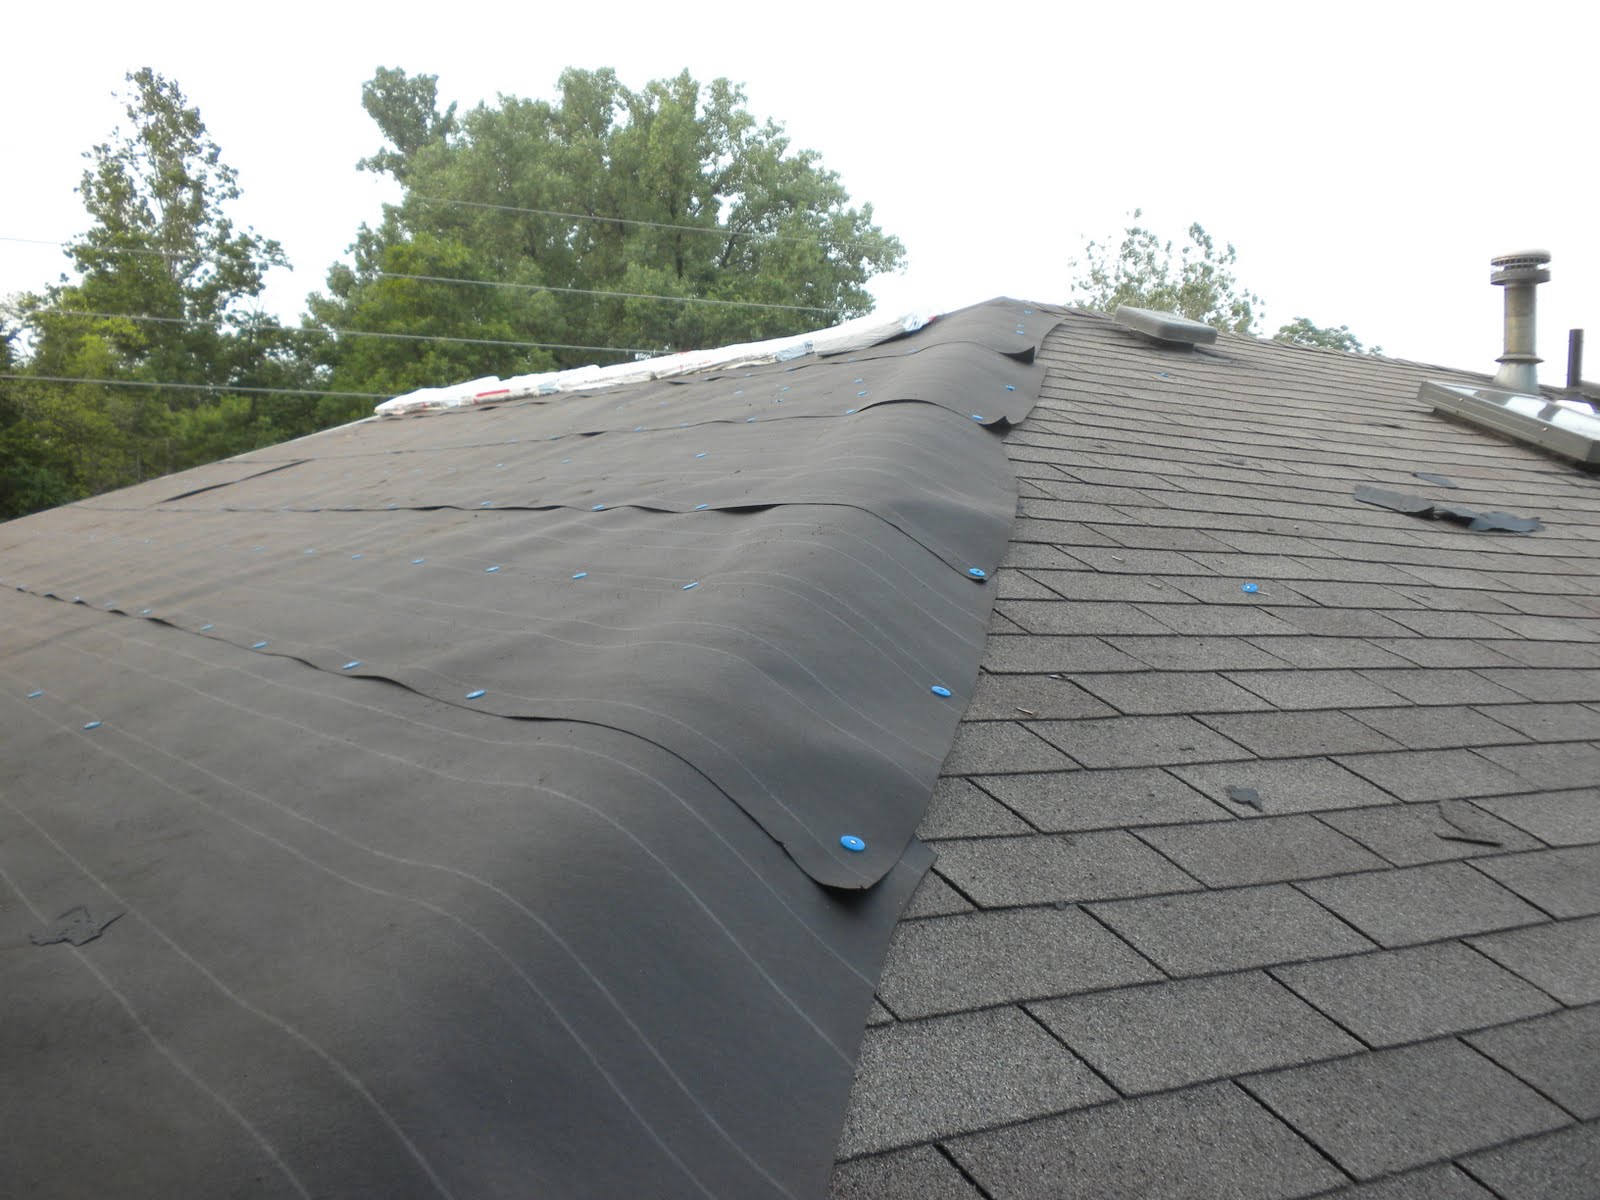
 Here is a picture of the WeatherLock and the 30# felt laid down. First we install our drip edge on the eave (bottom), installed our WeatherLock on top of it (no nails required, but cut into 10-15' sections to make it easier to manage), then installed our rolls of felt all the way up. When installing the felt you only nail the bottom and the middle, the top get secured via the next row. This helps to minimize the amount of holes in your felt. Also notice how we overlapped it over the hip onto the old shingles. This was due to we tore off over 4 days and did sections at a time.


Notice how your ridge caps are put together for future reference.

Here you can see we tore off the small section and then covered with a tarp to keep the rain off.

 When we went to install the West side we had to tear off the hip and over about 1-2' to allow us to properly overlap the shingles for weather protection. We then later cut off the extra.
 Here we are finishing cleaning up the tear off on the north side of the house. On average it took us about 2 hours per big section (West, North, and South sides, the little East section took very little time). We started on the North side at 6:45am and finished by 8am roughly.

A lot is happening in this picture.We have run a run of the WeatherLock along the eave again and just cut them directly in line with the valley. Then we ran another run down the valley with a 2' overlap at the top onto the other side all the way down to the bottom. Once we have our weather barrier properly installed for the valley, we then started to run felt into the valley and just cut them in the middle.

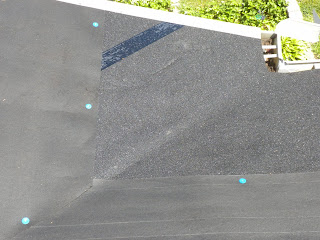
 My brother in law Josh is nailing the shingles while I'm busy with the valley. We are doing a 6 nail pattern. This bumps our wind resistance from 70 mph to 130 mph. Notice on the right edge that you don't see the drip edge (which is applied over the felt and WeatherLock on the rake). This is due to we have installed starter strip shingles along the eave and rake to help seal the shingles better. *Note, my brother-in-law just overhung the shingles the offset amount and figured we'd come back later and cut them. This worked until it got hot and then the shingles started to tear and stretch on the overhanging part. Make it easier on yourself, have someone cut them before you install so you can just line them up with the edge, you appreciate it later when you don't have to go back and cut all those edges, plus it'll look straighter.

 This is what happens when the WeatherLock gets hot. Hard to tell from the picture, but that's my footprint tearing it up due to the heat. Avoid walking or touching this stuff once it gets hot.
 My fireplace was a pain. The previous roofer incorrectly installed step flashing, so I had to remove my siding so I could properly seal my fireplace. I ran WeatherLock around all three sides starting at the bottom and ran it up the side of the fireplace about 4-5" to ensure no leaks.

 We nailed the top of the shingles over the ridge to protect the ridge from rain and later overlapped again.
A done two sides.
 When we install the shingles we just cut them straight down the valley to make it easy on us. Then after we were down I checked my math to make sure I expanded out1/8" for every 1' which means I expanded about 1 5/8" per side at the bottom. So I started with 2" from the center for each side at the top and 3 5/8" at the bottom. From that I snapped my chalk lines to cut out the valley.

 Here is my mother-in-laws son cutting the valley out. Be sure to be careful not to cut the metal. And don't do like we did and forget to use a straight edge ruler/level to make sure you are cutting straight lines. Opps, I forgot and my wife reminded me when we were almost done. So we used it to go back and clean up the edges. Oh and a side note - buy a pack of 50 hook blades, you'll need them a lot and they are worth it.


To properly install your ridge cap you take a cap and put it at one end bent over the middle and repeat at the other end. Then you snap your chalk line to one side of the edge. This helps you to nail a straight line all the way around the ridge.


 I used the two nail method for the ridge caps. I figured I went above and beyond for the shingles, might as well do it for the ridge caps as well.


 Here is my East and West side with new vents, and ridge caps installed. Looks pretty good if I do say so.