OK everyone. Sorry for the delayed update. I apologize. As my ankle has been slowing me down greatly, plus last weekend was Father's Day, I have been a little slow to get these pictures up. I'll upload my document that I went off of for the install tomorrow.
This is my old skylight. I took plenty of pictures to ensure I new how it was attached. Notice all the black stuff on the left side of the picture? That's where we had all the problems with the leaking.
Good idea to take plenty of pictures of all your vents, ridge cap directions (in my case it was put on incorrectly, I'll explain below).
This is how all the areas met for my ridge. I did a slight variation of this.
Here is my beautiful wife and her mother scrapping off the old roof. We had an interesting time in the fact that the roofer laid down two rolls of 15# felt. So... you're asking yourself? Well the problem was that they stapled one roll and cap nailed the other. This wouldn't have been a problem, except they used huge 2" staples to hold it down. Which means our tear off tool was hitting something everywhere. We ended up using a combination of a shingle tear off tool, a spade shovel, and a potato fork. All had pros and cons - shingle tool - great at pulling up nails, staplers, and shingles, but very heavy and got stuck a lot; spade - couldn't really get under the felt very well which meant for a lot of post cleanup; and potato fork - my favorite, light weight, got under everything easily, but left nails and hurt your back due to the small size.
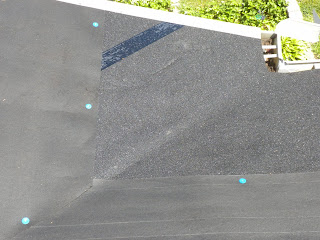
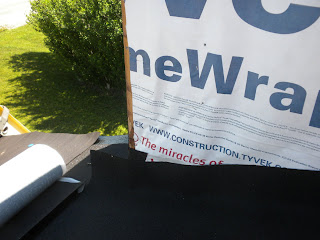
Here is a picture of the WeatherLock and the 30# felt laid down. First we install our drip edge on the eave (bottom), installed our WeatherLock on top of it (no nails required, but cut into 10-15' sections to make it easier to manage), then installed our rolls of felt all the way up. When installing the felt you only nail the bottom and the middle, the top get secured via the next row. This helps to minimize the amount of holes in your felt. Also notice how we overlapped it over the hip onto the old shingles. This was due to we tore off over 4 days and did sections at a time.
Notice how your ridge caps are put together for future reference.
Here you can see we tore off the small section and then covered with a tarp to keep the rain off.
When we went to install the West side we had to tear off the hip and over about 1-2' to allow us to properly overlap the shingles for weather protection. We then later cut off the extra.
Here we are finishing cleaning up the tear off on the north side of the house. On average it took us about 2 hours per big section (West, North, and South sides, the little East section took very little time). We started on the North side at 6:45am and finished by 8am roughly.
A lot is happening in this picture.We have run a run of the WeatherLock along the eave again and just cut them directly in line with the valley. Then we ran another run down the valley with a 2' overlap at the top onto the other side all the way down to the bottom. Once we have our weather barrier properly installed for the valley, we then started to run felt into the valley and just cut them in the middle.
My brother in law Josh is nailing the shingles while I'm busy with the valley. We are doing a 6 nail pattern. This bumps our wind resistance from 70 mph to 130 mph. Notice on the right edge that you don't see the drip edge (which is applied over the felt and WeatherLock on the rake). This is due to we have installed starter strip shingles along the eave and rake to help seal the shingles better. *Note, my brother-in-law just overhung the shingles the offset amount and figured we'd come back later and cut them. This worked until it got hot and then the shingles started to tear and stretch on the overhanging part. Make it easier on yourself, have someone cut them before you install so you can just line them up with the edge, you appreciate it later when you don't have to go back and cut all those edges, plus it'll look straighter.
This is what happens when the WeatherLock gets hot. Hard to tell from the picture, but that's my footprint tearing it up due to the heat. Avoid walking or touching this stuff once it gets hot.
My fireplace was a pain. The previous roofer incorrectly installed step flashing, so I had to remove my siding so I could properly seal my fireplace. I ran WeatherLock around all three sides starting at the bottom and ran it up the side of the fireplace about 4-5" to ensure no leaks.
We nailed the top of the shingles over the ridge to protect the ridge from rain and later overlapped again.
A done two sides.
When we install the shingles we just cut them straight down the valley to make it easy on us. Then after we were down I checked my math to make sure I expanded out1/8" for every 1' which means I expanded about 1 5/8" per side at the bottom. So I started with 2" from the center for each side at the top and 3 5/8" at the bottom. From that I snapped my chalk lines to cut out the valley.
Here is my mother-in-laws son cutting the valley out. Be sure to be careful not to cut the metal. And don't do like we did and forget to use a straight edge ruler/level to make sure you are cutting straight lines. Opps, I forgot and my wife reminded me when we were almost done. So we used it to go back and clean up the edges. Oh and a side note - buy a pack of 50 hook blades, you'll need them a lot and they are worth it.
To properly install your ridge cap you take a cap and put it at one end bent over the middle and repeat at the other end. Then you snap your chalk line to one side of the edge. This helps you to nail a straight line all the way around the ridge.
I used the two nail method for the ridge caps. I figured I went above and beyond for the shingles, might as well do it for the ridge caps as well.
Here is my East and West side with new vents, and ridge caps installed. Looks pretty good if I do say so.


No comments:
Post a Comment